Introduction
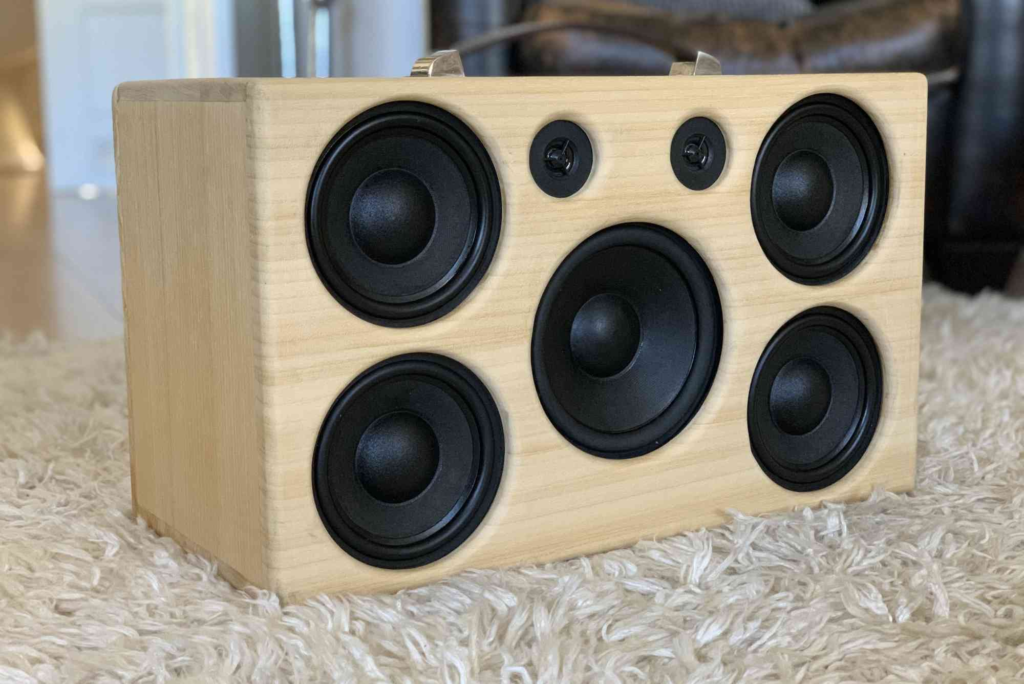
When it comes to achieving premium audio quality and unique style, few solutions rival the precision and beauty of custom fiberglass speaker box designs. Whether you’re an audiophile, car enthusiast, or a professional installer, custom-made fiberglass enclosures allow you to create a system that perfectly balances sound performance with aesthetic appeal. Unlike generic wooden boxes, fiberglass designs provide more freedom to shape, fit, and optimise your soundstage according to your exact preferences.
In this detailed guide, we’ll explore everything you need to know about designing, crafting, and refining custom fiberglass speaker boxes—from materials and moulding techniques to finishing and tuning. By the end, you’ll understand why fiberglass remains the top choice for creating premium sound systems that look as good as they sound.
Why Choose Custom Fiberglass Speaker Box Designs
Fiberglass has become a popular material in the world of custom audio installations because it offers unmatched flexibility and durability. Unlike MDF or plastic, fiberglass can be moulded into virtually any shape. This makes it perfect for vehicles where space is limited or irregular. Custom fiberglass speaker box designs can be integrated seamlessly into the car’s boot, door panels, or dashboard while maintaining the vehicle’s original aesthetic.
Beyond its visual versatility, fiberglass also offers superior acoustic properties. It provides a rigid and airtight enclosure that minimises distortion and ensures accurate bass response. This rigidity helps to prevent unwanted vibrations, allowing your speakers to perform at their highest potential. For anyone seeking both quality and creativity, fiberglass designs are the way forward.
The Process of Designing Custom Fiberglass Speaker Boxes
Creating a fiberglass speaker box is both a craft and a science. It requires patience, precision, and an understanding of sound dynamics. Let’s walk through the core stages of this process to understand what goes into a high-performance design.
Planning and Measurement
Before any material is cut or mixed, accurate measurement and planning are crucial. The first step is determining the available space and the speaker’s specifications—volume requirements, diameter, and mounting depth. Each speaker model has a recommended enclosure volume that must be met to ensure optimal performance.
Once dimensions are finalised, designers typically create a rough mock-up or digital 3D model to visualise the final layout. Planning helps prevent costly mistakes during the moulding stage and ensures every inch of available space is used efficiently.
Building the Frame and Mould
The frame forms the foundation of the speaker box. Builders often use MDF, foam, or even cardboard as a temporary structure to shape the enclosure. This base is covered with materials like masking tape and aluminium foil to prevent resin from sticking. Then, layers of fiberglass mat and resin are applied gradually over the mould.
Each layer must cure properly before the next one is added. This process may take several hours depending on the thickness and complexity of the design. Once hardened, the mould can be removed, leaving behind a solid fiberglass shell that forms the basis of the speaker box.
Sanding, Cutting, and Reinforcing
After the enclosure hardens, it’s time to refine its shape. Builders use sanders and cutting tools to smooth out rough edges, adjust curves, and create openings for the speakers. Reinforcing areas that will bear the most weight—like mounting points—is also essential.
This stage demands attention to detail, as any uneven surface can affect the final fit and sound quality. Proper reinforcement ensures that the box remains structurally sound even under high vibration or heavy bass loads.
Finishing and Aesthetic Design
Once the structure is ready, the fun part begins: finishing. Many enthusiasts customise their boxes with paint, vinyl wraps, or fabric to match their vehicle’s interior. For a more professional look, techniques like gel-coating or carbon fibre layering can be used.
If you’re exploring unique design ideas or need inspiration for materials and techniques, platforms like print & finishing insights offer a wealth of information on textures, coatings, and creative finishes that can elevate your project. A polished finish not only enhances the box’s appearance but also protects it from moisture and wear.
Sound Tuning and Installation
Once finished, the speaker box is fitted with the actual speakers, wires, and terminals. This step requires careful sealing to prevent air leaks. Proper tuning ensures that sound waves flow cleanly without distortion. Testing involves playing various frequencies to check for resonance or rattling.
Professional installers often use sound meters and dampening materials to fine-tune the acoustics. The result is a perfectly balanced, custom-engineered sound experience that no off-the-shelf box can match.
Advantages of Custom Fiberglass Speaker Box Designs
The benefits of using fiberglass for speaker enclosures extend well beyond aesthetics. Here’s why enthusiasts and professionals alike prefer this material.
Lightweight but Strong:
Fiberglass provides the perfect balance between strength and weight. Despite being lightweight, it offers high structural rigidity, reducing vibrations and resonance.
Fully Customisable Shapes:
Whether you want a compact design or a showpiece that flows with your car’s curves, fiberglass can be moulded to fit your vision precisely.
Superior Acoustic Control:
Fiberglass enclosures maintain internal air pressure efficiently, which enhances sound clarity and bass depth.
Long-Term Durability:
Resistant to moisture, temperature changes, and corrosion, fiberglass lasts longer than traditional materials like wood.
Professional Appearance:
A well-crafted fiberglass box can look like it came factory-installed. You can achieve sleek, high-end finishes that enhance your vehicle’s interior aesthetics.
Mistakes to Avoid When Making Fiberglass Speaker Boxes
While the results are impressive, creating fiberglass speaker boxes can be tricky. Avoiding common mistakes will help ensure your project’s success.
- Skipping accurate volume calculations: Incorrect internal volume leads to poor bass performance and distortion.
- Not sealing properly: Even tiny air leaks can drastically affect sound quality.
- Rushing the curing process: Fiberglass resin must cure fully between layers to avoid weak spots.
- Over-sanding: Excess sanding can thin the walls and weaken the structure.
- Neglecting ventilation: Always work in a well-ventilated space to avoid inhaling resin fumes.
Cost and Time Considerations
Building a custom fiberglass speaker box isn’t a quick project—it demands both time and skill. Depending on complexity, it can take anywhere from 10 to 40 hours to complete. Professional services may charge from £150 to £700 or more depending on the design and finish quality.
However, many enthusiasts find the investment worthwhile. Custom designs deliver better performance and a tailored aesthetic that generic boxes simply cannot replicate. For businesses that specialise in packaging or custom designs, exploring related industries such as Custom Boxes can also offer insight into material handling, precision crafting, and finishing techniques.
Custom Fiberglass Designs for Cars vs. Home Systems
While car installations remain the most common use case, fiberglass boxes also work beautifully in home audio systems. In vehicles, the focus is on fitting into tight spaces and maintaining aesthetics. For home systems, the priority often shifts to achieving perfect acoustic performance and visual harmony with interior décor.
In both cases, fiberglass allows for seamless integration and impressive sound fidelity. It’s a favourite among custom installers who aim to deliver sound quality that complements the environment.
Maintenance and Longevity
Maintaining a fiberglass speaker box is simple but essential. Regular cleaning with a soft, damp cloth prevents dust buildup that can interfere with sound quality. Avoid harsh cleaners, as these can damage the finish. Periodically check mounting points and seals to ensure everything remains tight and vibration-free.
With proper care, a custom fiberglass speaker box can last for decades, maintaining both its look and sound quality.
FAQs
Are fiberglass speaker boxes better than wooden ones?
Yes. Fiberglass is lighter, more durable, and allows for creative shapes that improve acoustic performance compared to standard wooden boxes.
How long does it take to make a fiberglass speaker box?
It depends on the design’s complexity, but most projects take between 10 to 40 hours from start to finish.
Can beginners make fiberglass speaker boxes at home?
Yes, with patience and proper safety equipment. However, professional training or tutorials are recommended for best results.
Is fiberglass safe to work with?
It is safe when handled properly. Always wear gloves, masks, and eye protection, and work in a ventilated area.
Can I paint or wrap my fiberglass speaker box?
Absolutely. Fiberglass accepts paint, vinyl, and fabric well, allowing full customisation to match your car’s or home’s interior.
Custom fiberglass speaker box designs are more than just enclosures—they’re expressions of craftsmanship, creativity, and acoustic mastery. Whether you’re upgrading your car’s sound system or designing a bespoke home setup, fiberglass provides the ideal combination of durability, flexibility, and style. With the right planning, materials, and finishing techniques, you can craft an enclosure that not only performs exceptionally but also reflects your unique personality.

