Box Packaging Design Vector: A Complete Guide to Modern Packaging Art
Creating a professional box packaging design vector is one of the most important steps in building a strong brand presence. Whether you are designing for retail, e-commerce, or luxury goods, vector-based packaging artwork ensures sharp quality, scalable graphics, and print-ready results. In today’s competitive market, brands need packaging that attracts attention instantly. This is why understanding how vector design works—and how to use it effectively—matters more than ever.
In this comprehensive guide, you will learn how to design box packaging using vector tools, what elements to include, how to follow printing standards, and what trends shape modern packaging. You’ll also find practical tips, expert insights, and helpful resources to spark your creativity.
Understanding Box Packaging Design Vector Artwork
A box packaging design vector is a digital, scalable illustration created using vector software such as Adobe Illustrator, CorelDRAW, Affinity Designer, or similar tools. Unlike raster images, vector graphics maintain clarity and crispness at any size. This is essential for packaging because boxes are produced using large-format printing machines that demand high-resolution files.
Vector artwork allows designers to create dielines, add brand elements, incorporate illustrations, and maintain exceptional print quality. Moreover, this format helps manufacturers adjust dimensions easily without compromising the design.
Why Vector Matters in Packaging Design
Vector design offers unmatched precision. Every line, cut, fold, and bleed mark must be accurate so the final box looks polished and professional. When you design using vectors, printers can read and process your artwork without distortions. This helps avoid production issues such as blurred edges, misaligned cuts, or colour inconsistencies.
Another advantage is flexibility. Brands often need multiple box sizes for seasonal promotions or new product launches. Vector files can be modified quickly while keeping the visual identity consistent. This saves time and reduces the risk of design errors.
Key Elements Every Box Packaging Design Vector Should Include
A successful packaging design balances aesthetics with functionality. When designing a box vector layout, you need to include both creative and technical components to ensure the artwork looks beautiful and prints correctly.
Brand Identity
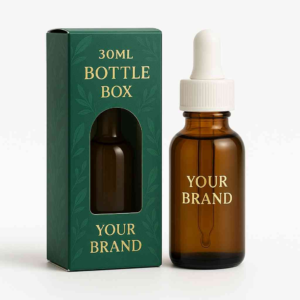
Your box should reflect your brand’s personality. Logos, colour schemes, typefaces, and icons must be vector-based to maintain crispness. Consistency across your packaging helps customers recognise your products at a glance.
Dielines
A dieline acts as the blueprint of the box. It includes cut lines, fold lines, bleed areas, and safe zones. These technical details guide printers on how to assemble the packaging. Using vectors ensures the dieline remains exact.
Product Information
Include essential details such as product name, features, nutrition information, safety instructions, or ingredients. Keep the design clean and structured for quick readability.
Visual Elements
Illustrations, patterns, and background shapes should all be vector-based. This avoids pixelation and allows easy recolouring during revisions or rebranding.
Barcodes and Certifications
Although barcodes themselves are not vector, adding them correctly within your vector layout ensures they remain scannable. Leave sufficient clear space around the barcode and position it according to your product category requirements.
How to Create a Box Packaging Design Vector Step-by-Step
Designing a box can feel overwhelming at first. However, following a structured approach simplifies the process.
Start with the Box Style
Choose a box type—mailing box, tuck-end box, rigid box, or sleeve. Each style has a different dieline. Your box shape depends on your product’s size, weight, and display requirements.
Build or Download a Dieline
Many designers create dielines manually, but this requires skill. You may also download templates or request dielines from your manufacturer. Ensure the dieline is accurate before adding artwork.
Set Up Your Artboard
Use CMYK colour mode and include bleed margins (usually 3–5 mm). This prevents white edges after trimming.
Apply Brand Assets
Place your logo, tagline, and typography. Ensure they follow your brand guidelines. Keep important elements away from trim lines.
Add Creative Artwork
This is where your design comes alive. Use vector patterns, textures, and illustrations to enhance visual appeal. Consider how the box will appear on shelves or in unboxing videos.
Insert Product Details
Use clean, readable fonts. Keep spacing consistent. Group related information to maintain a visual hierarchy.
Check Colour Profiles
Printing relies on CMYK, not RGB. Convert all artwork to CMYK before exporting your final file.
Prepare for Print
Save the file as a print-ready PDF with outlined fonts. Ensure all images are embedded and that bleeds are included.
Modern Trends in Box Packaging Design Vector
Trends continuously shape packaging styles. Brands embrace these design movements to stay relevant and attract modern consumers.
Minimalism
Simple layouts with clean lines and limited colour palettes are popular. This approach highlights the product’s quality while providing a premium feel.
Eco-Friendly Aesthetics
Natural textures, hand-drawn illustrations, and earthy tones communicate sustainability. Many eco-conscious brands adopt this design theme.
Bold Typography
Large, expressive fonts grab attention quickly, especially for display packaging. Combining typography with vector shapes creates an impactful design.
Geometric Art
Symmetrical patterns, sharp angles, and smooth curves help your packaging stand out. Vector tools excel in creating perfect geometric visuals.
Custom Illustrations
Brands now prefer exclusive illustrations instead of stock images. This trend adds personality and helps create a stronger emotional bond with customers.
Tools for Creating Professional Box Packaging Vector Designs
Several design tools provide the precision needed for packaging projects.
Adobe Illustrator
The industry standard. Ideal for dielines, precise drawing, and vector-based graphics.
CorelDRAW
A favourite among packaging engineers for its robust technical tools.
Affinity Designer
A budget-friendly vector program with powerful capabilities.
Online Dieline Editors
Platforms offering ready-made templates make designing easier for beginners.
Whenever you work on packaging, choose software that supports CMYK, vector exports, and PDF/X-standards for printers.
Examples and Sources for Inspiration
Exploring real-world packaging helps spark ideas during the design process. Many designers browse creative galleries to study trends and techniques. If you’re looking for box design inspiration, you can explore projects at Packaging of the World, which showcases impressive designs from across the globe.
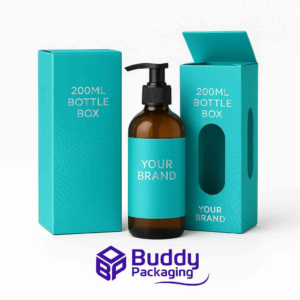
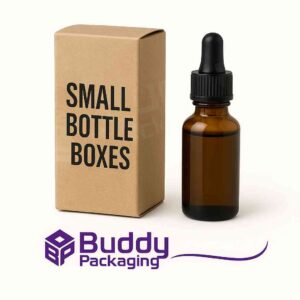
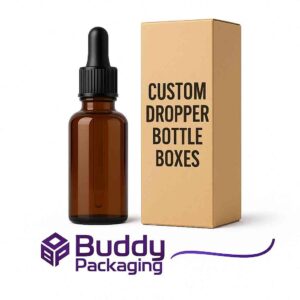
Additionally, for businesses needing packaging solutions, you can order professional Custom Boxes from Buddy Packaging.
Common Mistakes to Avoid When Creating Packaging Vector Artwork
Even experienced designers can overlook details that affect print quality. Avoid the following pitfalls:
Using Low-Resolution Images
Even though your main elements should be vector, sometimes product pictures or textures are added as raster images. Ensure they are high-quality and in CMYK format.
Forgetting Bleed Margins
Without proper bleeds, the final printed box may show unwanted white edges.
Poor Hierarchy
Placing many elements without structure confuses buyers. Create order by prioritising essential information.
Ignoring Box Assembly
Your design must align perfectly when the box is folded. This requires understanding how panels connect.
Overloading Colours
Too many colours increase print costs and may cause patchy results. Stick to a deliberate palette.
FAQs
What is a box packaging design vector?
It is a scalable, print-ready digital design created with vector software. It includes the dieline, artwork, branding, and product information needed to print and assemble a box.
Why is vector used in packaging design?
Vector graphics are scalable and precise, making them ideal for printing at any size without losing quality. This ensures sharp lines, accurate cuts, and professional results.
How do I create a packaging dieline?
You can create one manually using vector software or request a dieline from the box manufacturer. Templates are also available online for most box styles.
Which software is best for box packaging design?
Adobe Illustrator is the most widely used tool due to its accuracy and extensive vector features. CorelDRAW and Affinity Designer are also great alternatives.
Can I use RGB colours for packaging design?
No. Packaging should be designed in CMYK because printers use this colour system. Converting from RGB later may cause colour shifts.
Start Creating Your Box Packaging Design Vector Today
Designing a box packaging design vector requires skill, creativity, and attention to detail. When done properly, it elevates your product, strengthens your brand identity, and enhances customer experience. By following best practices, studying modern trends, and using the right tools, you can produce packaging that stands out in any market.
If you need professional packaging for your business, explore high-quality Custom Boxes through Buddy Packaging for tailored solutions that match your brand. And whenever you need creative ideas, you can always draw box design inspiration from leading design galleries.